Linux配置clash代理&docker挂代理
clash for linux配置
在线订阅转换
1.安装clash
GitHub地址
1
2
3
| git clone https://github.com/wanhebin/clash-for-linux.git
cd clash-for-linux
vim .env
|
注意: .env 文件中的变量 CLASH_SECRET 为自定义 Clash Secret,值为空时,脚本将自动生成随机字符串,第一次需要将代理链接填入
https://sub.sqfly.site/sunbear/sunbear/api/v1/client/subscribe?token=778ecd9546caf40b5635be57e93bbd52
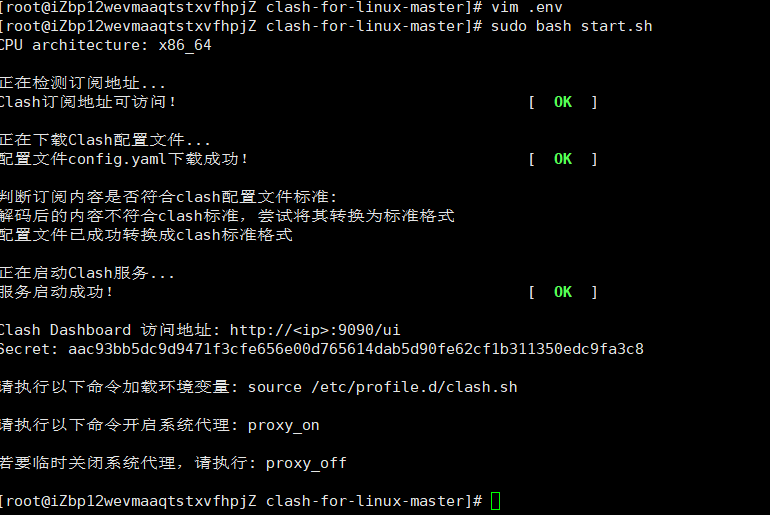
2.运行启动脚本

3.加载环境变量、启动代理
1
2
3
| source /etc/profile.d/clash.sh
proxy_on
# 可以不开启代理,后面会配置让docker走代理端口,如果开启了可能会影响服务器yum功能,proxy_off
|
4.检查服务端口
1
| netstat -tln | grep -E '9090|789.'
|
5.检查环境变量
1
| env | grep -E 'http_proxy|https_proxy'
|

centos安装docker
1.先删除本机旧的或者残留的docker
1
2
3
4
5
6
7
8
| sudo yum remove docker \
docker-client \
docker-client-latest \
docker-common \
docker-latest \
docker-latest-logrotate \
docker-logrotate \
docker-engine
|
2.安装依赖
1
2
3
| sudo yum update -y && sudo yum install -y yum-utils \
device-mapper-persistent-data \
lvm2
|
3.配置镜像源
1
2
3
4
5
6
7
8
9
|
yum-config-manager \
--add-repo \
http://mirrors.aliyun.com/docker-ce/linux/centos/docker-ce.repo
yum-config-manager \
--add-repo \
https://mirrors.tuna.tsinghua.edu.cn/docker-ce/linux/centos/docker-ce.repo
|
4.安装
1
| yum install docker-ce docker-ce-cli containerd.io
|
如果遇到签名问题warning: /var/cache/yum/x86_64/7/docker-ce-stable/pa…
需要关闭docker-ce的gpg验证,将gpgcheck=1改成gpgcheck=1=0步骤如下
1
2
3
| vi /etc/yum.repos.d/docker-ce.repo
在:模式下输入
%s/gpgcheck=1/gpgcheck=0/g
|
5.启动并设置开机自启动
1
2
| systemctl start docker
systemctl enable
|
ubuntu安装docker
1.安装依赖
1
2
3
| sudo apt-get update
sudo apt-get install software-properties-common
sudo apt-get install ca-certificates curl gnupg lsb-release
|
2.添加docker的官方GPG密钥
1
| curl -fsSL http://mirrors.aliyun.com/docker-ce/linux/ubuntu/gpg | sudo apt-key add -
|
3.添加阿里云的Docker CE镜像源
1
| sudo add-apt-repository "deb [arch=amd64] http://mirrors.aliyun.com/docker-ce/linux/ubuntu $(lsb_release -cs) stable"
|
4.安装docker
1
| apt-get install docker-ce docker-ce-cli containerd.i
|
5.安装docker-compose(可选)
1
| apt-get install docker-compose
|
6.开启自启动
1
2
| systemctl start docker
systemctl enable
|
docker配置梯子
1.修改镜像仓库为官方地址
1
2
3
4
5
| vim /etc/docker/daemon.json
{
"registry-mirrors": ["https://hub.docker.com/"]
}
|
2.创建代理配置文件目录
1
| sudo mkdir -p /etc/systemd/system/docker.service.d
|
3.写入代理配置
1
2
3
4
5
| sudo vim /etc/systemd/system/docker.service.d/http-proxy.conf
[Service]
Environment="HTTP_PROXY=http://localhost:7890"
Environment="HTTPS_PROXY=http://localhost:7890"
|
4.加载配置、重启docker
1
2
3
4
5
6
|
systemctl daemon-reload
systemctl restart docker
systemctl show --property=Environment docker
|
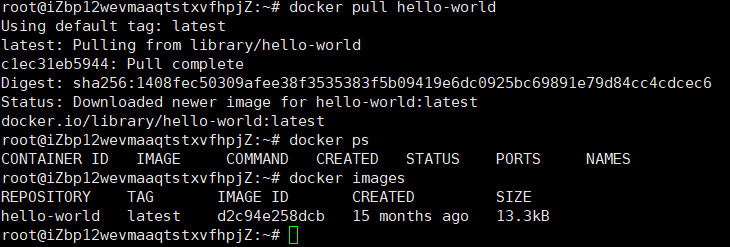
5.测试是否成功
拉取hello-world进行测试,发现速度很快,成功挂上代理


